To learn about the Parent Letter in the New Teacher Homepage, click here.
Overview
The Parent Letter is a personalized letter from the teacher to inform each student’s parents of their known and unknown skills. It includes each student's test results (correct items, incorrect items, and the grade, if Grade Scales were set up). To avoid students memorizing the items in test order, correct and incorrect items will be shown in alphabetical order. If an item was not tested, it will be optional to include it on the Parent Letter. Question and Summary Notes (teacher observations during testing) can also be included. The Parent Letter can be printed in English or Spanish and saved as a Word.doc or PDF. The Spanish translation is available as a template, but the Parent Letter can be written by the teacher in any language and then saved as a template. It can also be printed in color. All tests from a particular tab can be included, and there is also the option to omit certain tests from the Parent Letter. The test session date will be included by default, but an option is available to not include it on the Parent Letter. This Support Page will provide step-by-step instructions for:
- Running the Parent Letter
- Explaining the Test Table
- Including all tests in one Parent Letter
- Fixing the Test Title Repeating under Correct and Incorrect
- Modifying the Parent Letter Template (message to parents)
- Creating a new template in another language
Running the Parent Letter
1. Select Parent Letter Report on the right side of the screen.
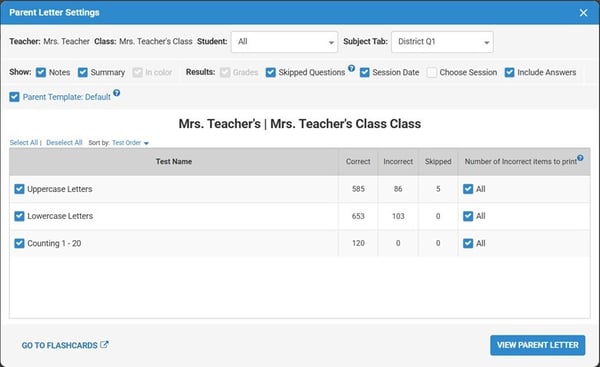
2. Select your desired class or student with the drop down at the top of the Parent Letter Window.(see Image 1).
Image 1
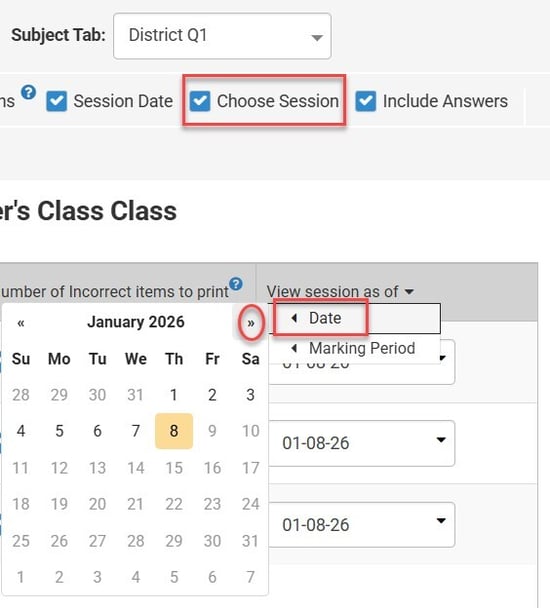
3. "Choose Session" Option Details: When Choose Session is checked, a new column, "View Session date as of" will appear.
Image 2

3B. There are two options for selecting a test session date:
-
Select a specific date using the calendar picker. The report will run with the latest test session on or prior to that date. If there are no prior test sessions, the test will not appear on the report for that student.
Image 3
-
Select a Marking Period. The report will run using the last date of the selected marking period. The actual date will be visible.
Image 4
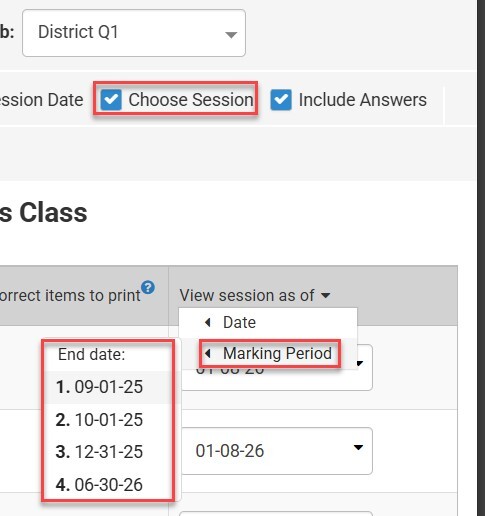
Note: If the report is run without making any date selections, it will generate using the last test session as of the day the report is run. If the option to show the test session date is selected, it will show the exact test session date that has been selected. The test session/marking period dates are globally applied to all tests with a checkbox to the left of the test name but can be customized for each test.
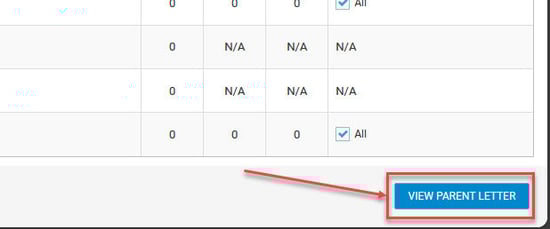
4. Once the desired settings are selected, click VIEW PARENT LETTER.
Image 5
5. Sample Parent Letter with options:
Image 6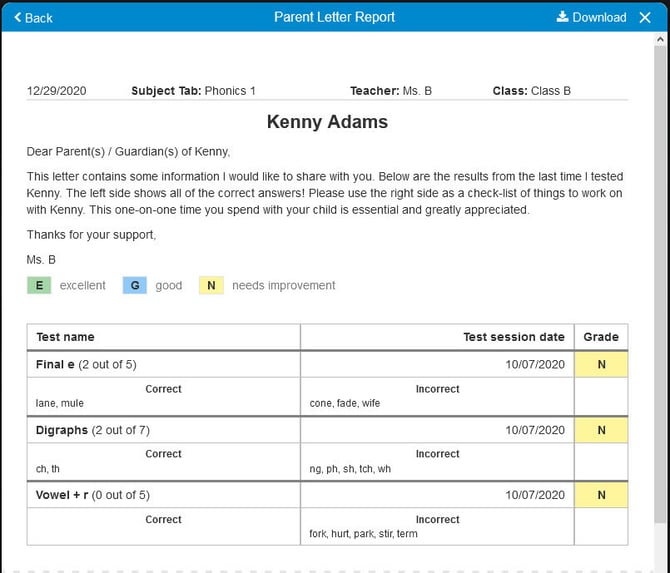
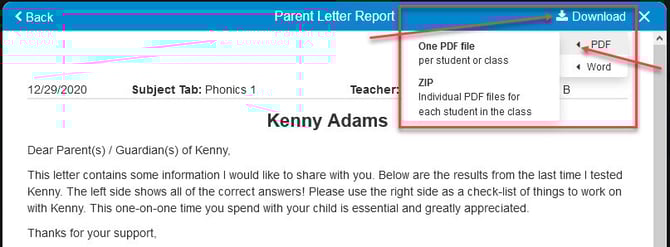
6. To download as Word.doc or PDF to print and/or email to parents, click “Download”, then click the left arrow for PDF or Word. Select either “One PDF File” / “One Word File” (a single file that contains all students) or “ZIP” (a zipped folder that contains individual files for each student):
Image 7
Explaining the Test Table
- If All Students are selected, the Correct, Incorrect and Skipped counts are for all students.
-
Questions that were skipped and/or not given during testing are separated from the incorrect answers, however, are still counted as incorrect. To not include the "Skipped Questions ", uncheck the box.
- For a Single Score test, N/A will display for "Incorrect" and "Skipped" as there is only one question on this test type.
-
The number of incorrect items to print can be "All" or only a certain number. Deselect "All" and enter the desired number to print.
- Once a Subject Tab is selected, all tests on that tab will display. To not include a test on a Parent Letter, uncheck the box. You can choose to sort tests in Test Order or Alphabetical.
Image 8
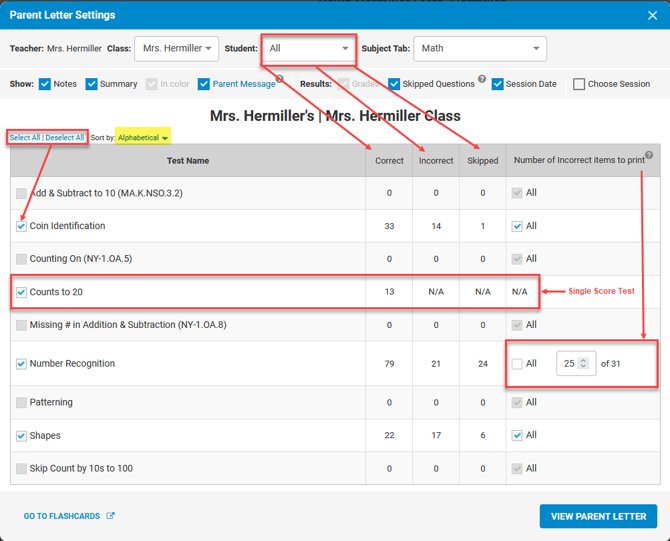
Image 9

Including all tests in one Parent Letter
The tests that appear on a Parent Letter (and all other reports) depend on the Subject Tab the tests are on. To print the Parent Letter with all tests, create your own Subject Tab with all the tests that you want to appear together on the Parent Letter. Tests can appear in more than one Subject Tab, and the same data is reported on each if the exact same test is used.
Fixing the Test Title Repeating under Correct and Incorrect
If the Question Name appears as the answer to the question on the Parent Letter under the “Correct” and “Incorrect” headings, then the author used the Test Title for the Question Name of each question when creating the test. This field should be the name of the question and can be edited only by the test author. The Edit/Modify a Test Support Page provides step-by-step instructions.
The Question Name is usually the answer to the question (the sight word, the pattern, etc.), but it can be the question itself. When the answer is the sight word, the letter, the sound, etc., the Parent Letter is easy to understand. If the Question Name is the question itself (i.e., "What word is this"), then it will be difficult for the parent to understand. With addition and subtraction, the Question Name should be the equation, such as 2 + 5, instead of just 7.
It is important to keep this short since they will print on the Parent Letter. Longer names make the report very difficult to read.
Image 10


Modifying the Parent Letter Template (Message to Parents)
The text on each Parent Letter Template can be edited but must be manually edited in each language. ESGI does not automatically translate templates in the Classic Version, so each Parent Letter Template must manually be edited for all languages (if you have multiple languages in your class).
The Parent Letter Template can be edited by an individual teacher within their account. A District Admin can create a universal message for all teachers to use within their District Admin account. See District Parent Letter for complete details.
Please follow these steps to customize the Parent Message:
- Click on Parent Letter under Student Reports.
- To modify the Parent Message in a teacher’s account, click the blue Parent Message text located underneath the Student Dropdown in the Parent Letter Settings popup:
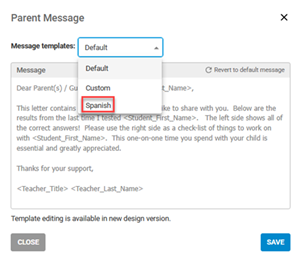
- Select the Language from the drop down, click Edit Message, and then modify the Parent Letter text in that language.
Please Note: ESGI does not automatically translate, so each template must be edited in that language. Do not edit the symbols or text within the < and >; they are needed to populate the Parent Letters. - Drag and drop optional titles to auto-populate information.
- Click SAVE when finished editing.
- Click the blue VIEW PARENT LETTER button at the bottom right of the Parent Letter Settings popup.
- Your custom template will now be applied to your Parent Letter Report.
- You can download and print your Parent Letter Report by clicking on the blue Download button located at the top right of the Parent Letter Report preview.
Image 11

Creating a New Template in Another Language
Please follow these steps to create a Parent Letter Template in another language:
1. Click on Parent Letter under Student Reports.
2. Click the blue Parent Template: text located underneath the Student Dropdown in the Parent Letter Settings popup.
3.Click on the Message Templates dropdown, then click Add new... to manually create and save a new custom template for the desired language.
4. Under Template Name, type in the name of the language that this template is for (Spanish, French, Arabic, Chinese, etc.)
5. Under Message, enter the desired language text for the Parent Letter in the box (we recommend translating using a tool such as Google Translate or ChatGPT then copying/pasting it into ESGI. You could also use another language keyboard if available).
-
Our Parent Letter Translations Support Page provides English translations to Tagalog, Mandarin, Vietnamese, German and Russian.
-
Do not edit the symbols or text within the < and >, as they are needed to populate the Parent Letters. Editing the font is optional.
6. When your translated template is complete, click the blue SAVE button to save your template and automatically apply it to the Parent Letter.
Note: If you wish to switch templates, click on the Message Templates Dropdown.
7. Your custom language template will now appear on the Message Templates dropdown, for future usage (Image 13).
8. Click the blue VIEW PARENT LETTER button at the bottom right of the Parent Letter Settings popup.
9. Your custom language template will now be applied to your Parent Letter Report.
10. You can download and print your Parent Letter Report by clicking on the blue Download button located at the top right of the Parent Letter Report preview.
Image 13