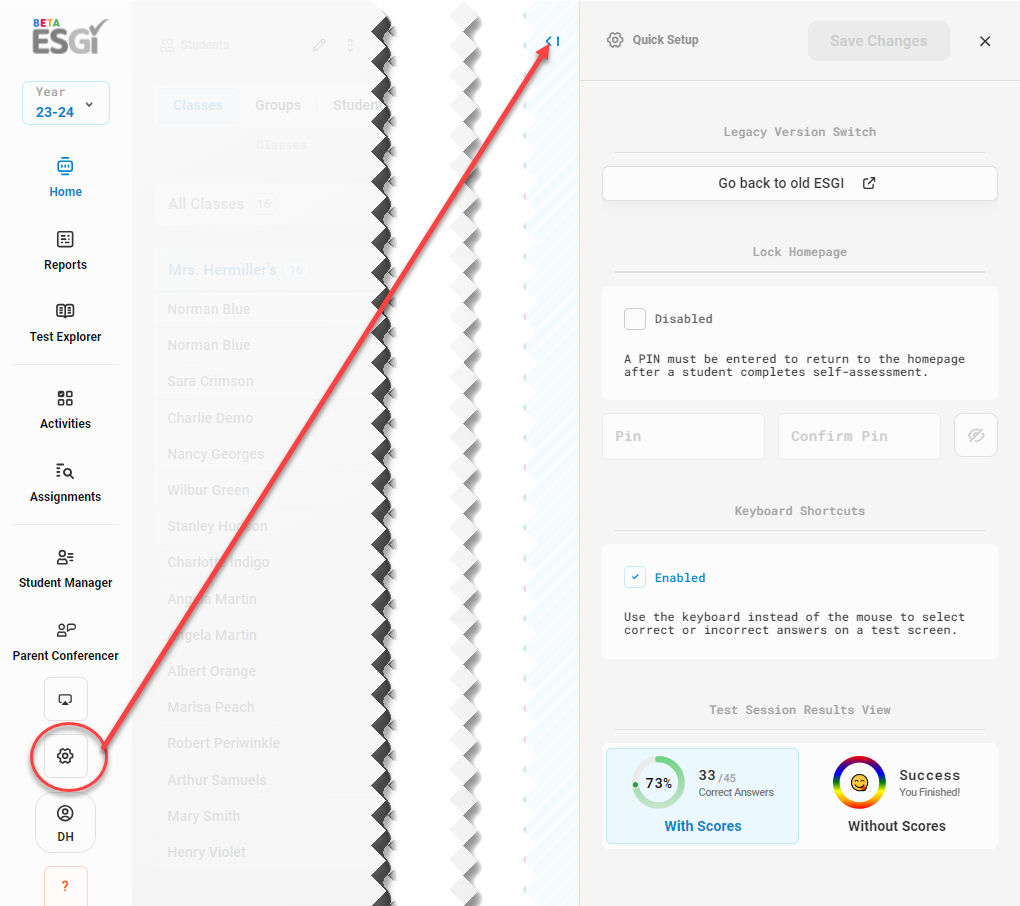
Click on the settings icon in the left-hand column of the home screen to access the Quick Setup. Select the arrow to the left of the Quick Setup icon to see all the system setting options.
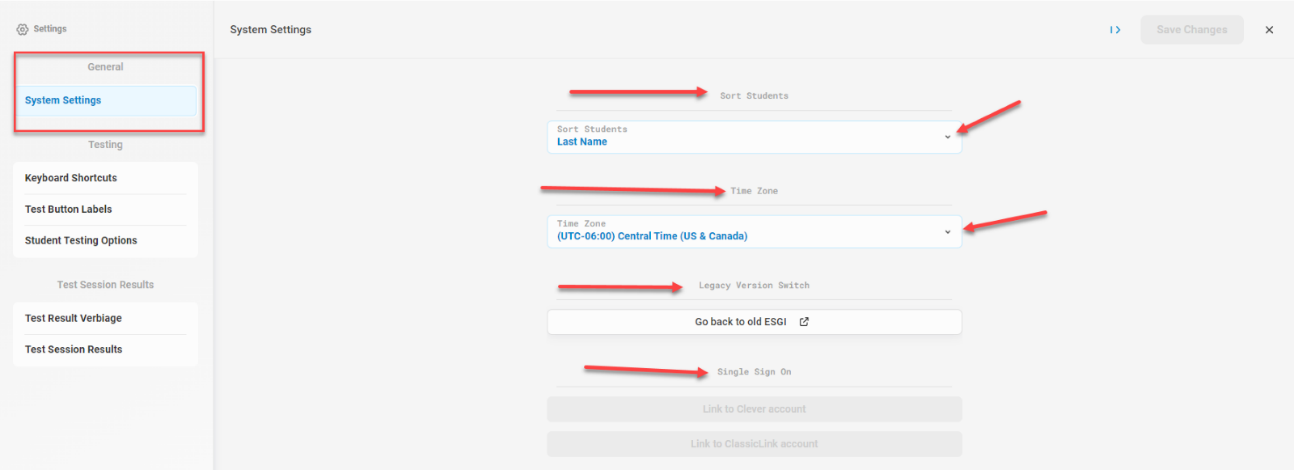
GENERAL:
-
Sort Students by: Use the dropdown arrows to sort students by first or last name. Click SAVE when finished.
-
Time Zone: Use the dropdown arrows to select the correct time zone. Click SAVE when finished.
-
Legacy Version Switch: to return to the Legacy version of ESGI, select Go back to old ESGI.
-
Single Sign On:
-
Select the appropriate link below for complete details on linking your ESGI account to Clever or ClassLink for single sign-on.
-
TESTING:
-
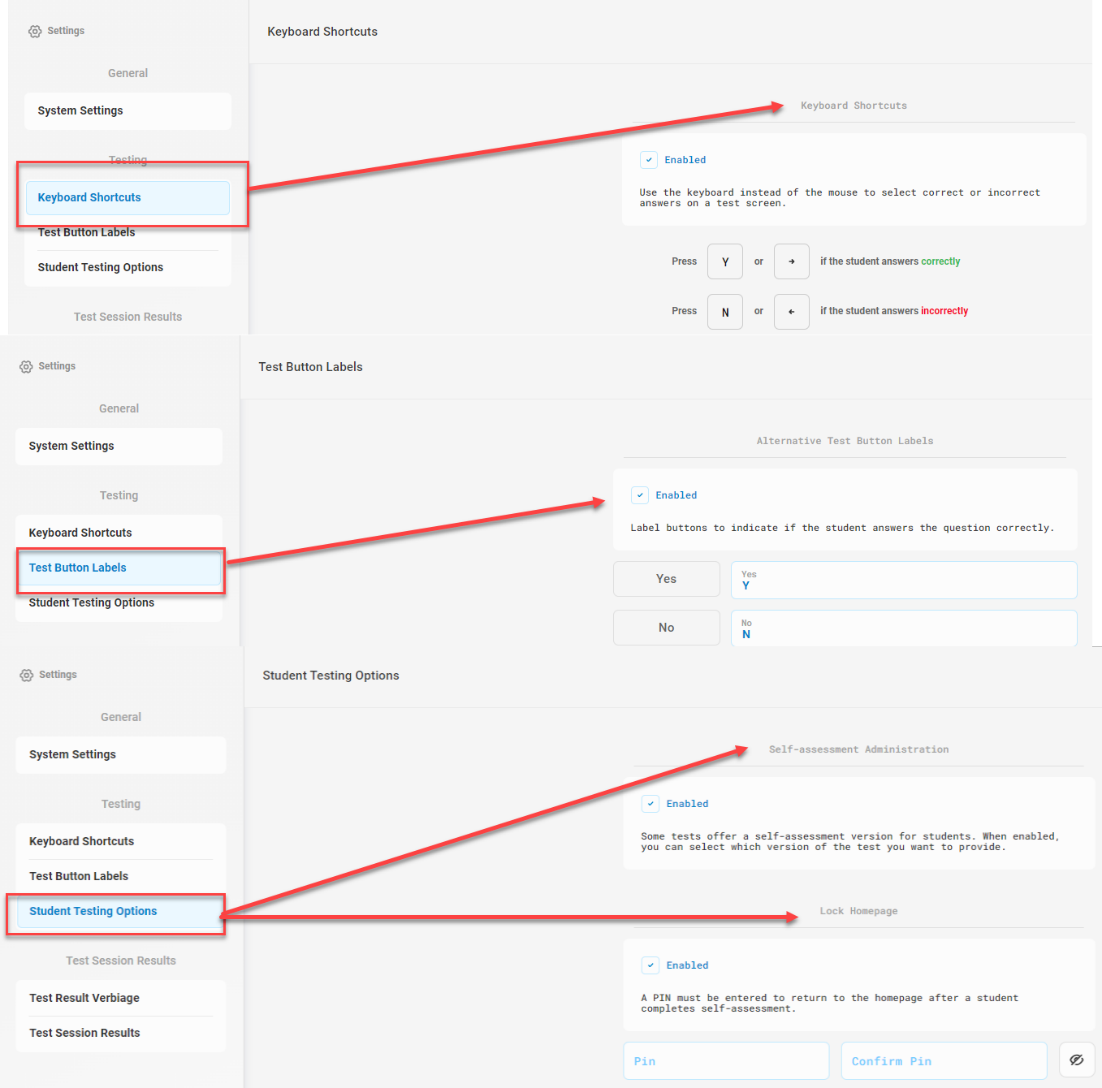
Keyboard Shortcuts:
-
Enabled – Allows you to use the left and right arrow keys or the letters “Y” and “N” on the keyboard to mark a question as correct or incorrect, instead of clicking the “Yes” and “No” buttons on the screen. Click SAVE when finished.
-
-
Test Button Labels:
-
Enabled: Allows you to change the “Yes” and “No” test button labels to something else (i.e., “Y” and “N”). This field has a 5-character limit. Click SAVE when finished.
-
-
Student Testing Options:
-
Self-assessment Administration - when enabled allows you to select to administer a test one-on-one or as a student self-assessment.
-
Lock Homepage – when enabled, requires that a PIN be entered to return to the homepage after a student completes self-assessment.
-
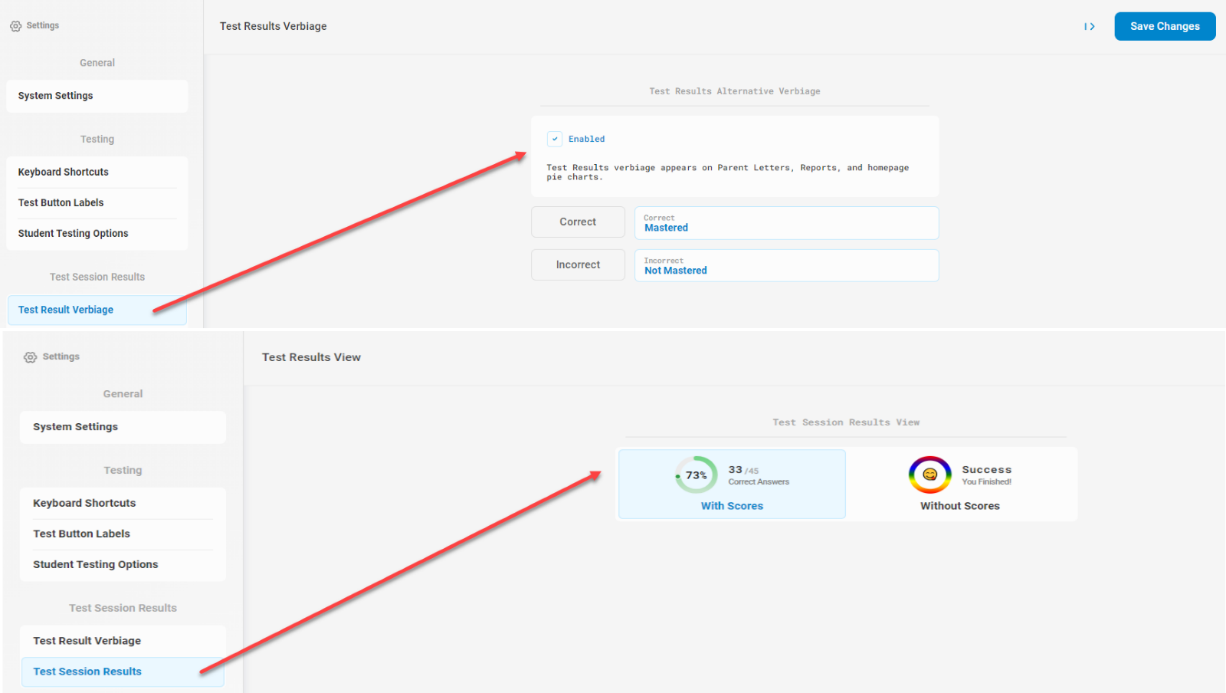
TEST SESSION RESULTS:
-
Test Result Verbiage: Customize to change the verbiage for tests results from Correct/Incorrect to something else (I.e., “Mastered” and “Not Mastered”). This field has a 12-character limit. Click SAVE when finished. The custom verbiage will display everywhere where “Correct/Incorrect” previously displayed.
-
Test Session Results:
-
-
Select With scores to enable a pie chart display when a test session has ended.
-
Select Without scores to display graphic without scores
-